
Use the app’s obstruction tool at the intended dish position before a permanent installation. Trees, roof edges, and other objects can interrupt the connection as satellites move overhead. Recheck after moving the kit or when foliage changes.
Current information and next steps
Use Starlink Help Center for the options and instructions that apply to your location and equipment. You can also browse our Starlink resources or send a correction with the page link and a dated source.
This earlier edition was last edited 2026-04-22. Its tests, prices, screenshots, plan names, and forecasts refer to that period. Use the guidance above for current checks.
Having not just a fast but also a reliable internet connection is crucial in almost any aspect of our online lives.
Satellite-based internet providers, in particular, are prone to signal disruptions – and Starlink is no exception to that rule.
One way to boost that reliability is by minimizing obstructions, which are physical barriers interfering with the line of sight between the satellite dish and the satellite in orbit.
In this article, I will outline how to check and minimize obstructions as well as how accurate the metrics are that Starlink provides.
How to Check for Obstructions in the Starlink App
Obstructions in the Starlink app can be checked during the installation process as well as when using the hardware on a regular basis. Luckily, both are pretty straightforward.
Starlink will ask you to analyze potential obstructions before you decide on the placement of the dishy. Here’s how.
First, you download the Starlink app, which after logging in, should direct you to the self-service installation page. Then, you will be greeted with a window that asks you to select the type of dish you own.

The next page will detail how you need to check for obstructions. In essence, you want to be standing where you aim to place the dishy. You’ll then use your phone camera to scan the sky for potential obstructions.

Now, this is where the fun begins. Starlink tasks you with collecting a set of green dots, which represent potential entry and exit points of where the signal could travel.
After you're done with the scanning process, you can view the results of the scan right within the app. Starlink provides users with an estimated score and tells you whether your view is obstructed and where said obstruction (north, south, west, east) is coming from.

Consequently, you can continue to monitor your level of obstruction once the setup process is completed.
Starlink tracks and displays various network metrics, such as latency, usage, and uptime (which obstructions fall under), under the ‘Stats’ page, which you can access right from the homepage.
There, you click on ‘Outages’, which takes you to another page that simply lists all the interruptions your dishy has faced in the past 12 hours.

In most instances, obstructions will only last a few seconds at best and are thus barely noticeable, especially if you just browse the web.
If your level of obstruction is too high (more on that in the next chapter), then you can go through the same scanning procedure I just described, which can be accessed on the app’s homepage.
How Much Obstruction Is Too Much for Starlink?
The answer to that question ultimately boils down to your individual use cases and preferences. Generally speaking, you would want to minimize obstruction as much as possible.
In reality, 100 percent uptime is a) not always necessary and b) something even fiber-based ISPs cannot continuously deliver.
If browsing as well as audio and video streaming is all that you use Starlink for, then a few seconds of downtime here and there won’t really affect your experience (especially with buffering).
Related: everything you need to know about Starlink
Any obstruction score that is in the single-percentage digits (= % of time dishy has been obstructed in the last 12 hours) should therefore not materially affect your browsing experience.
However, there are a few activities that do rely on near-perfect uptime. Video conferencing, online gaming, live streaming yourself, or running remote servers are just a few examples where reliability is crucial.
With that being said, Starlink should still perform substantially better in terms of uptime versus competitors like HughesNet that rely on satellites in geosynchronous orbit.
How to Minimize Obstructions
In order to minimize obstructions, we first to understand how Starlink works under the hood.
As you may have read, Starlink utilizes a constellation of thousands of satellites, which your dishy communicates with.
Due to the vastness of Starlink’s constellation, there’s always at least one satellite that your dish is connected to.
Signals between satellites, ground stations, and the dishy are then transmitted via microwave radio frequencies, which travel in straight lines and thus cannot move through solid objects.
Related: how to fix the 'No Signal Received' error
As such, those signals can theoretically be blocked by houses or trees. The first rule of thumb is to place the dishy in a location that’s not surrounded by anything but the clear sky.
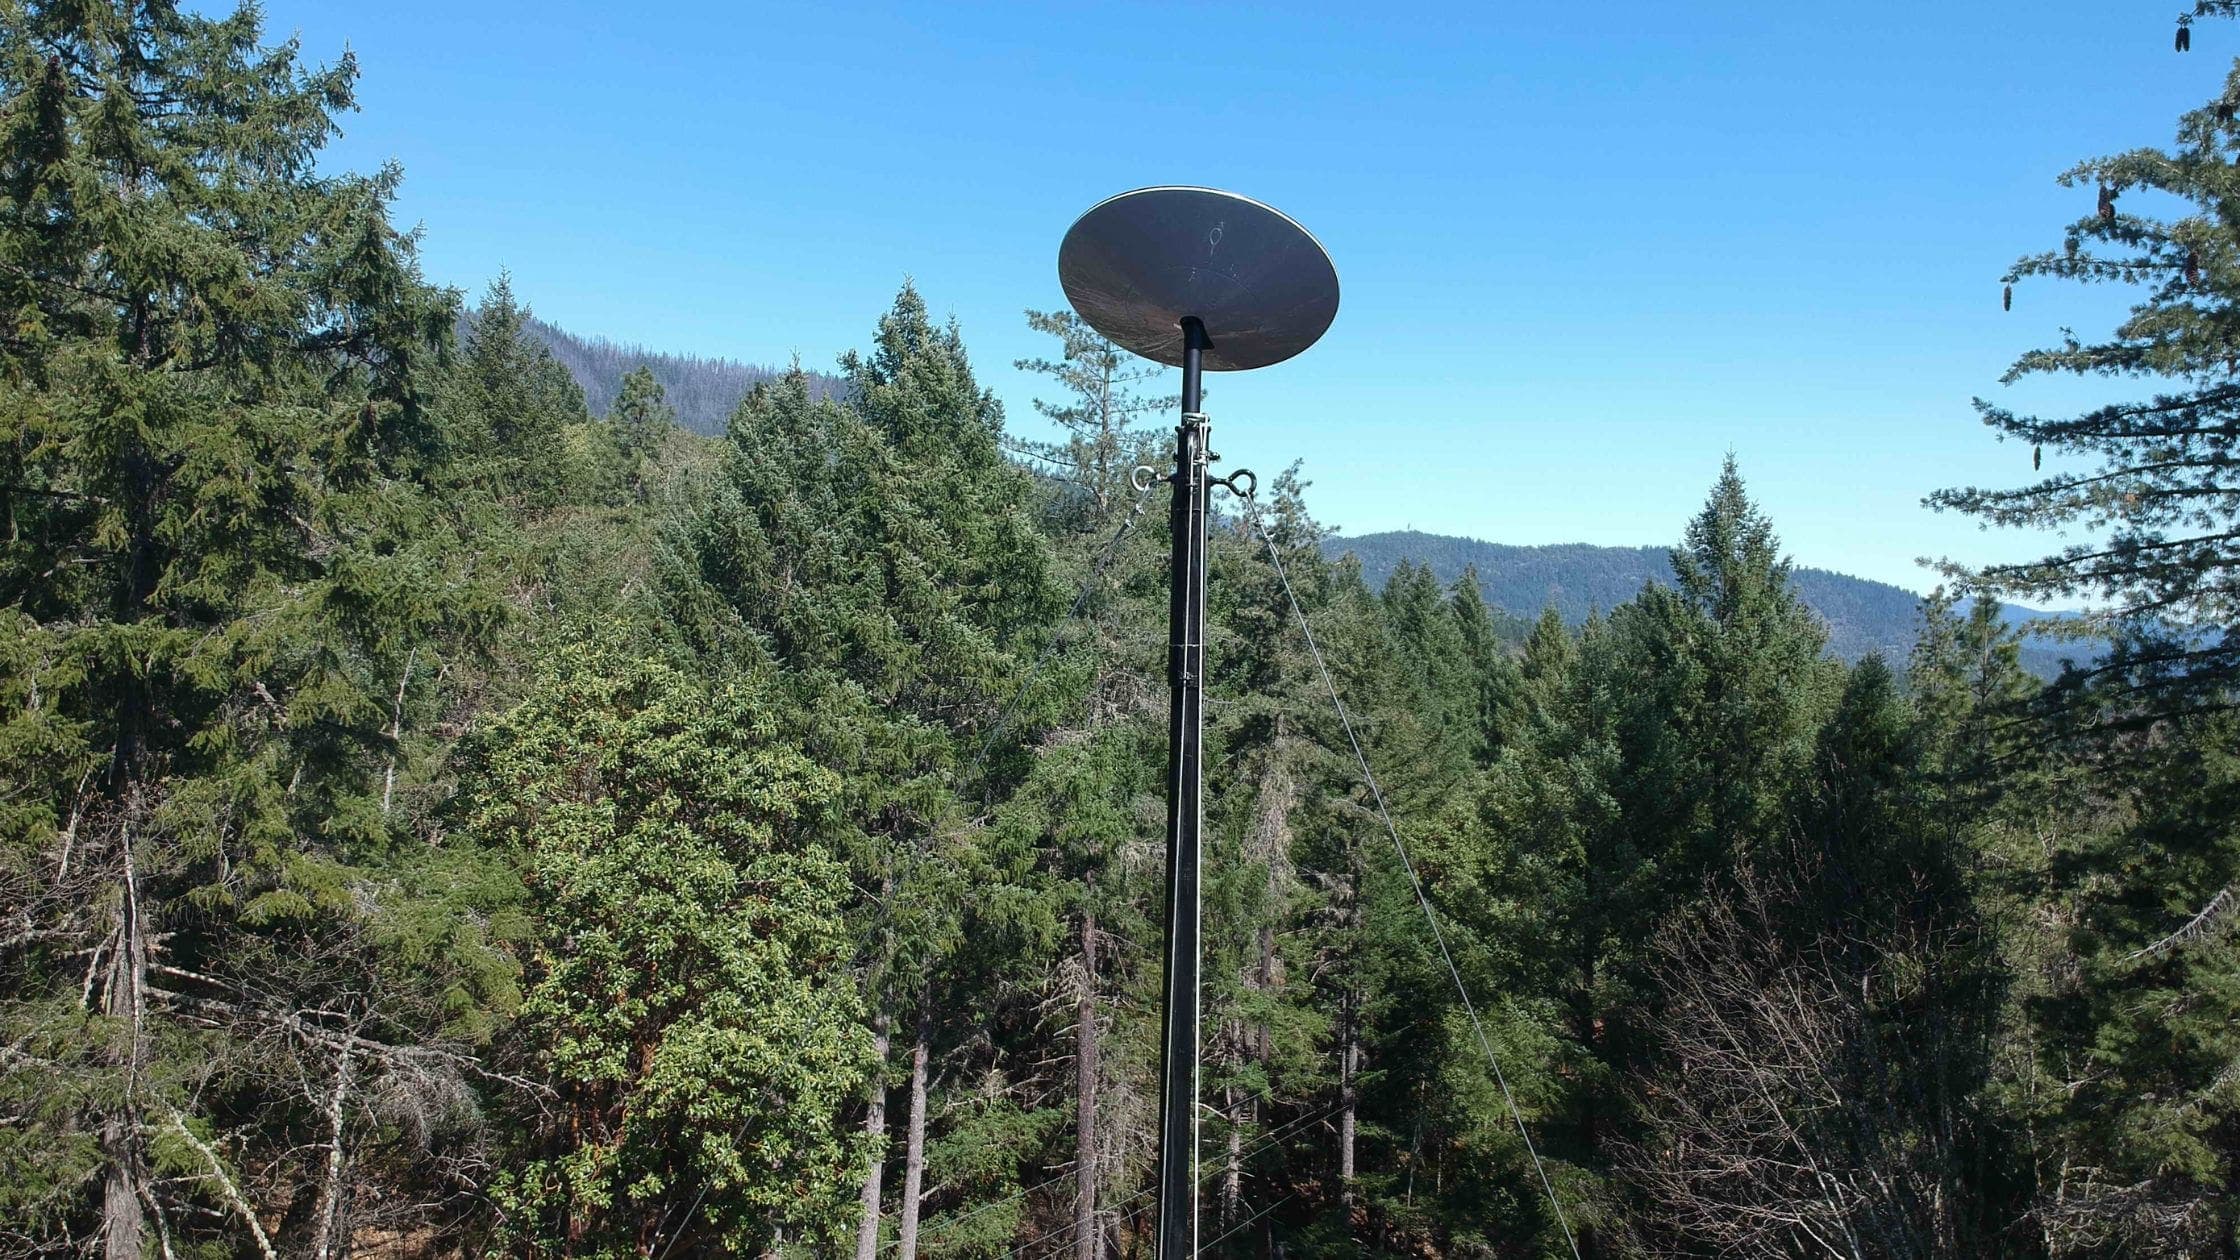
If that’s not possible for whatever reason, then your second-best bet is to increase the dishy’s placement height.
The two most commonly adopted methods are to either mount the dish on top of a building or to use a pole mount like the one pictured below.
In both cases, you may need help with hardware mounting as well as cable deployment. Feel free to check out our professional installers directory should you need any assistance.
How Accurate Is the Starlink Obstruction App?
The Starlink app should be fairly accurate in determining the level of obstructions users will get to experience.
After all, it’s in Starlink’s best interest to provide you with the best possible performance, especially considering that the subscription can be canceled at any time and at no cost.
The reality may differ in some instances, though. While some users have reported that Starlink’s estimates are roughly in line with actual performance, others stated that they either had substantially fewer or far more outages than initially projected.
Unfortunately, you won’t know for sure until you’ve tested the kit. Luckily, you can test Starlink for free for the first 30 days, so the financial risk is fairly minimal.
About Viktor
Tech founder · Starlink user since 2022
I'm Viktor, a tech founder and Starlink enthusiast based in Germany. I've used Starlink since 2022 and have been writing about it ever since. Starlink Insider is my hobby blog alongside the other tech startups I build.
About Starlink Insider
//16 comments
Good questions and thoughtful perspectives are welcome.
Replying to Rex Walker
Replying to Viktor Hendelmann
Replying to cynthia stone
Replying to john alexander burke
Replying to Viktor
Replying to Jess Valderrama
Replying to Bud
Replying to Robert